EC2 Instance
Amazon Elastic Compute Cloud is a web service provided by Amazon
to spin up desired type Virtual Machine in any available Region.
Let’s see how to launch an EC2 instance or Virtual Machine.
After we have successfully created an account in
AWS and logged in, Select EC2 from the service drop-down.
We need to select the region from the top right corner drop down in which EC2 instance to be launched. I have selected Singapore as an example. Click on the Launch Instance button.

In this step we need to select what operating is needed for
the EC2 instance. There are multiple options available like Amazon Linux, RHEL,
SUSE Linux, Ubuntu, etc..
Let’s select the checkbox beside Free tier only to be sure we are selecting the template that is free
for practicing.

In this step, we need to choose the computing power needed
for the EC2 instance. Lets select t2.micro type as highlighted in the screenshot
below and click on Next: Configure
Instances Details button.

Enter the number of instances to be launched. Let's keep
default network and we can choose the Availability Zone of our choice otherwise
AWS will choose one of the AZ by default. Also, select Enable from the Auto-assign
Public IP drop-down for EC2 to be accessible from the internet.
Then click on Next: Add
Storage button.

By default, Root
mount point is available and we can add any additional mount points if needed.
Note:
There is no option to encrypt the Root mount. You can encrypt while creating
the AMI from the Root volume snapshot.
Click on Next: Add
Tags button.

Add Key as Name
and Value as My First EC2 Instance. This is optional, but it will be helpful to
differentiate when we have many instances.
Click on Next:
Configure Security Group button.

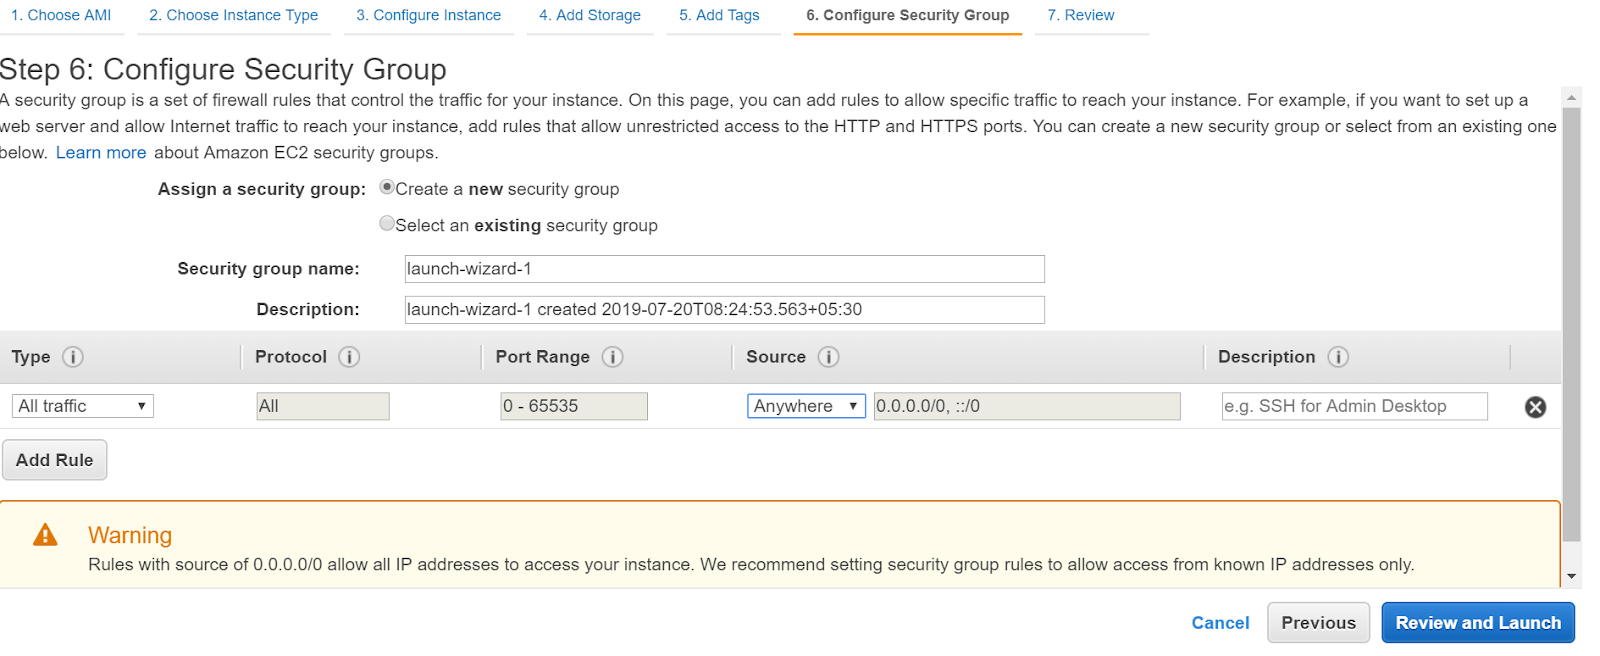
In this step, you may create your custom security group name
or retain the default name. Select All
traffic in the Type drop-down
and Anywhere from the Source dropdown. This will set the
rule to allow connectivity to EC2 instance from anywhere.
Then click on Review
and Launch button.
Verify all the details of the EC2 instances and click on
Launch button.

There is no existing key pair so let’s create a new key pair.

Select Create a new
key pair from the drop-down and enter a Key pair name. Click on Download
Key Pair to download the pem file. Then click on the Launch Instances button.

This the screen indicates that options selected are good to launch the EC2 instance in
selected AZ and region.


Launch the puttygen tool to convert pem file to ppk file.

Click on Load
button and browse pem file download. Successfully
imported foreign key message should appear. Then click on OK button.

Click on Save private
key button
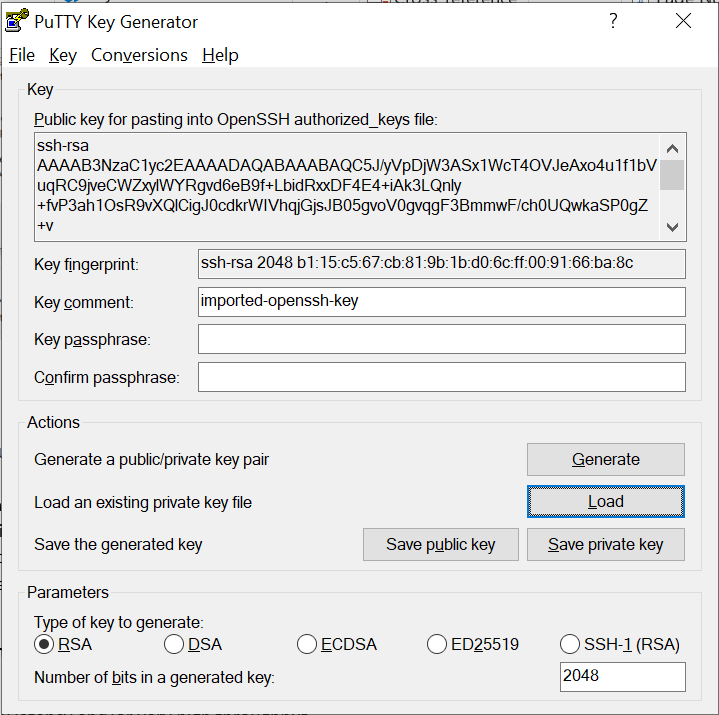
Click on Yes in
the Puttygen warning and save the file with extension PPK.

Navigate to EC2 instance in the AWS console and Check the
status of the Instance is running and 2/2
checks is successful. Also, Note IPv4
Public IP.

Launch the putty and enter the public IP in the Host Name
(or IP address) text box.
Expand SSH and select
Auth from left-hand pane. Click on
Browse to select the PPK file saved in the above step.
Click on Open button.

Click on Yes in
the PuTTY Security Alert popup.

Enter the AWS EC2 default user name ec2-user. This will allow to login without any password
successfully.

Comments
Post a Comment