Active Directory and Federated user creation
Requirement:
Create users in Active Directory and provide selective access to AWS services.
Solution:
- Create EC2 Windows machine (OS version 2008/2012/2016)
- Configure AD in windows machine
- Configure DNS Server
- Configure PTR record in DNS
- Create test users in AD
- Reset the Administrator user password in AD
- Create Directory service in IAM
- Create role and policy in Directory Service and establish trust.
- Create AWS Domain/console URL to access from federated user
- Enable management console access to Domain URL.
- Add users in Directory service
- Test the access for federated users
Detailed steps:
Create AD and create users in AD. Should be able to login to
AWS Console with selective access.
1.
Launch a Windows 2012 R2 instance in custom VPC
and subnet.
a.
Create the VPC with CIDR range 10.0.0.0/16
b.
Create two public subnet with CIDR range
10.0.1.0/24 and 10.0.2.0/24
c.
Create Internet Gateway and attach to VPC.
d.
Add a route in Route table and target to IGW.
e.
Launch a Windows 2012 R2 EC2 instance with
Public IP enabled.
2. Assign the IP address in Preferred DNS Server
a.
Login to EC2 and launch Network connections by
issuing ncpa.cpl in run prompt.

b.
Right-click on Ethernet and select Properties
c.
Disable IPv6 and click on IPv4 then properties

d.
Launch the command prompt and note the IP
address of EC2 machine.
e.
Select the radio button “Use the following DNS
Server addresses” and enter the EC2 instance IP address in Preferred DNS Server
then click on OK button.

3.
Install Active Directory in the EC2 instance.


5. Configure DNS Server.


6. Add new PTR.


7.
Add new test users in AD.


8. Create Directory Services.


a. Launch the Server Manager by issuing server manager in run prompt.
b. Click on Add roles and features link in Server Manager dashboard and click on Next button

c. Select Role-based or feature-base installation and click on Next

d. Select radio button Select a Server from the server pool and click on Next

e. Select check box beside Active Directory Domain Services

f. Click on the Add Features in the pop up


g. Observe that Install Success message and click on Close button

h. Click on notification icon on the top right and Click on Promote This server to a domain controller link

i. Select radio button beside Add a new forest and Enter the Root domain name

j. Enter DSRM password and Confirm password and click on Next

Note: This password is used to restore the Active Directory in case AD is corrupted.
k.Click on Next in DNS Option screen and Addition Option screen a.


l. Ignore the warnings and click on Install

Note: the server will be rebooted automatically. Wait for 5 min and reconnect to the server.
4. Repeat the steps listed in Step 2 to reassign
the Preferred DNS Server.5. Configure DNS Server.
a.
Launch the Server Manager by issuing
server manager in run prompt.
b. Click on Tools from the top right and click on DNS.

c. Expand server and Select Reverse Lookup Zones, Right click and click on New Zone.


d. Enter first three digits of IP address in Network ID

e. Select the ration button beside Allow both nonsecure and Secure dynamic updates.

f. Click on Finish

a. Expand Reverse Lookup Zones and right-click on Zone just created then click on New Pointer(PTR)..

b. In New Resource Record, Browse and select windows host.

c. Click on OK


d. Launch the Power shell and execute nslookup to verify hostname will resolve into new domain created

a.
Select Active Directory Users and Computers from
the Tools in top right corner.

b.
Expand Aws4dummes à
Users à
New à
Users

c.
Create users

d.
Set the password for the users also select check
box beside Password never expires

e.
Click on Finish

f.
Reset the password for Administrator user

a.
Login to AWS console, Navigate to Services à Directory Services
b.
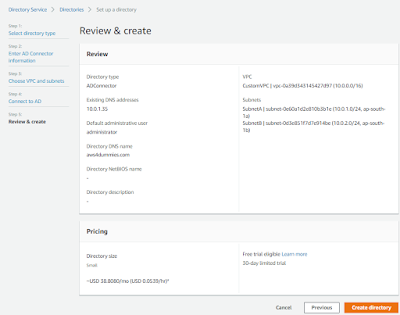
Click on Create Directory
c.
Select AD Connector in and click on Next

d.
Select the Directory Size info as per
requirement.

e.
Select the VPC and select the subnets created in
the VPC.

f.
Enter the DNS name and DNS IP address


g.
Review the details and Click on Create Directory

h. It will take approx 5-10 min for this
step to complete and status to turn Active if all the configuration is
correct.

9.
Create IAM Role and Policy in Directory Service.


a.
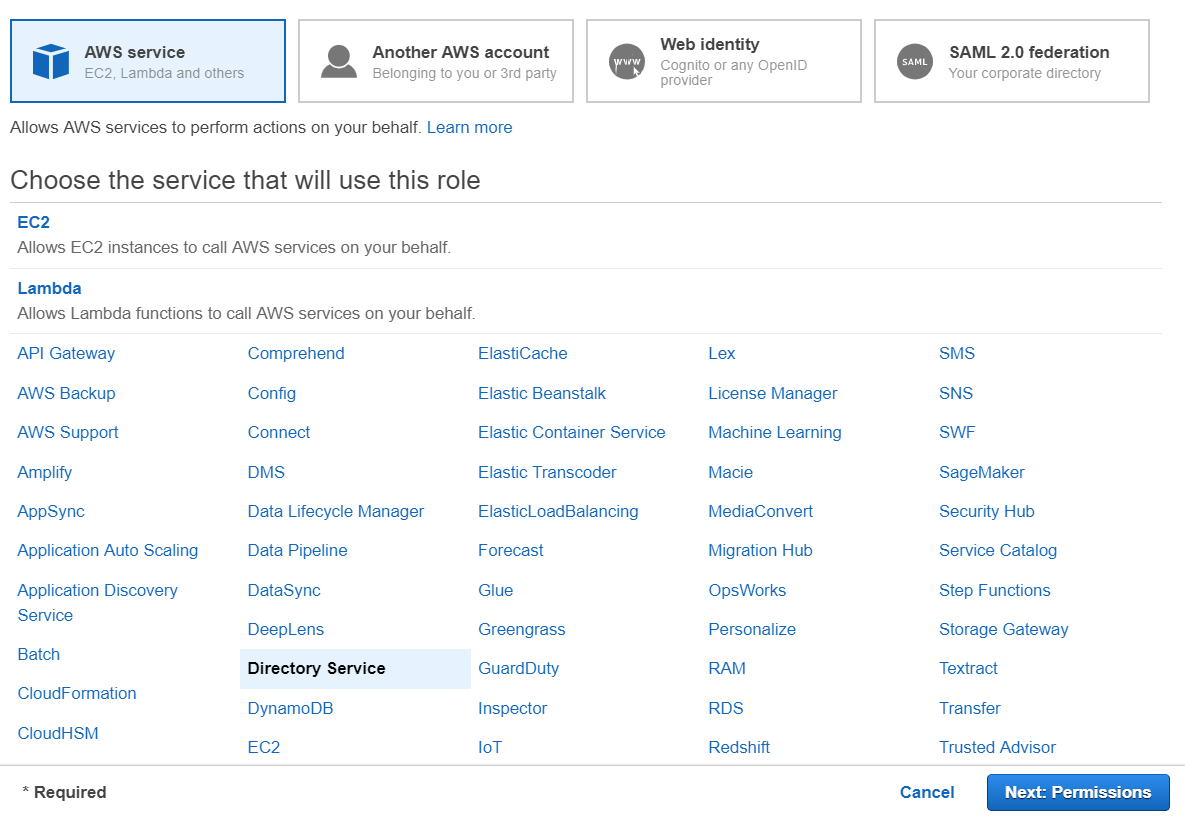
Navigate to Services à IAM à Roles à Create Roles

b.
Choose Directory Service and click on Next:
Permission button
c.
Search EC2 and select AmazonEC2FullAccess


d.
Enter the Role Name of your choice and click on
Create Role

e.
Navigate to Services à Directory Services and ensure
custom Role created is listed in Delegate Console Access section

a.
Navigate to Services à Directory Services à Directory created
above

b.
Enter the console access URL and click on Create

c.
Click on Enable button


d.
Enable AWS Management Console access

11.
Add users to allow access the custom AWS console
URL.


a.
Navigate to custom Delegate console access role
b.
Click on Add button to add the users created in
AD to allow access to custom AWS URL

c.
Search the users created and click on Add


12.
Login to Custom URL created for AD users and
test the access.
a.
Access the URL and login using the user created

b.
Navigate to Services à EC2 and we should be able to
access with full permission.

c.
Navigate to Services à S3 to ensure we are not
having permission.

Note:
Directory service role is created only with Full access to EC2. Hence, AD user won’t
be able to access any other services in AWS.
Comments
Post a Comment